Easy-to-grow daylilies
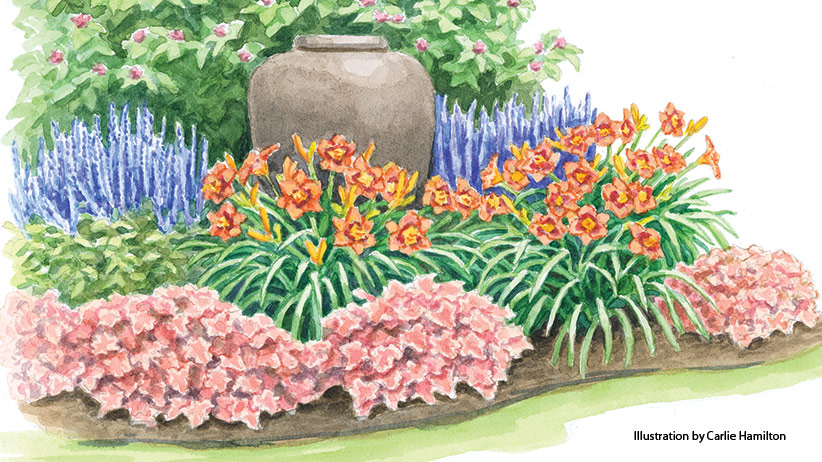
Daylilies are easy to grow and they’re everywhere: the neighbor’s backyard, city hall and even in the ditch. But that doesn’t mean they’re just a boring flower that fills empty space! If you're wondering how to grow dayliles as beautiful as the photo above I've got good news for you: daylilies aren't hard to grow, and great for beginner gardeners. They are one of the most forgiving perennials around, with plenty of sun and regular water you can have truly stunning daylilies that really live up to their potential.
Delightful and diverse world of daylilies
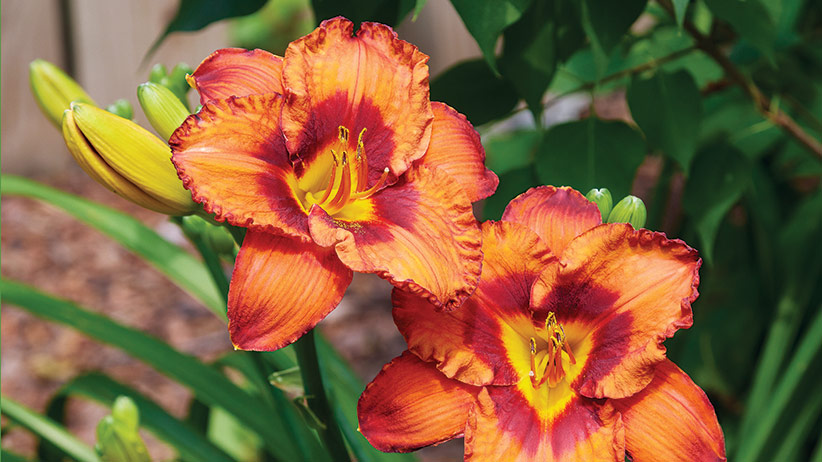
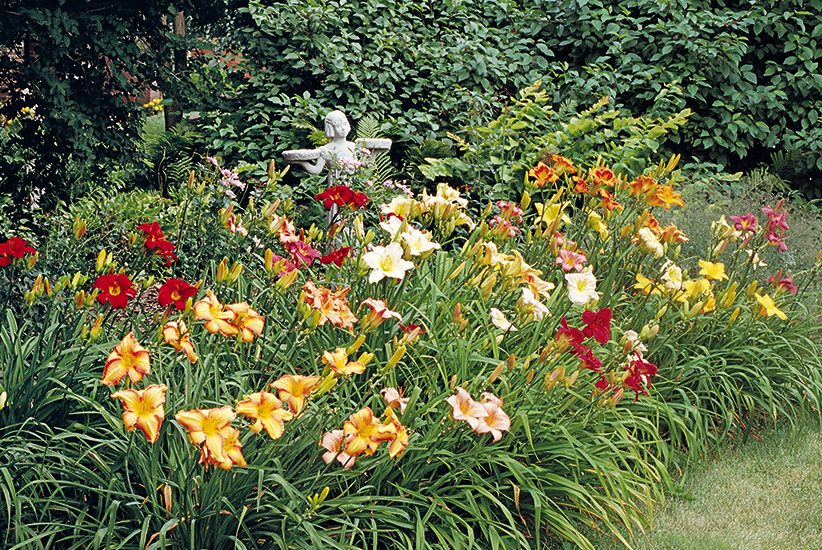
Why are gardeners devoted to growing these resilient beauties? Well for one thing, there are more than 90,000 cultivars registered with the American Hemerocallis Society (AHS) — that means there are at least 90,000 ways this flower can be unique. How? Whether it’s flower form, hardiness, fragrance, bloom time or more, each new cultivar boasts a different characteristic. This difference is as noticeable as more blooms per plant or a brighter colored flower (in any shade but blue), or as subtle as a change in the markings on the petals.
You Might Also Like:
Unique Daylilies
Best Long-Blooming Daylilies
How to Divide 45+ of Your Favorite Perennials
10 low-maintenance perennials for your garden

Basic daylily care
Regardless of what your garden’s story may be, the first chapter is about knowing how to grow a daylily well. Sure, they can be hands-off, but here are a few practices that will keep them looking great.
1. Consistent watering
Well-drained soil will keep your daylily’s crown and roots from rotting, but consistent moisture ensures that the plant will bloom profusely. Make sure your daylilies get a couple of inches of water each week whether it’s from rain or the hose. This way they’re more likely to keep sending up scapes — the stalks that bear the blooms.
2. Feed annually
Daylilies aren't super fussy about fertilizer. An annual top dressing of compost in spring is just fine. Or try a low nitrogen fertilizer, such as Milorganite®using one cup per clump in spring and again in fall.
3. Remove spent daylily blooms
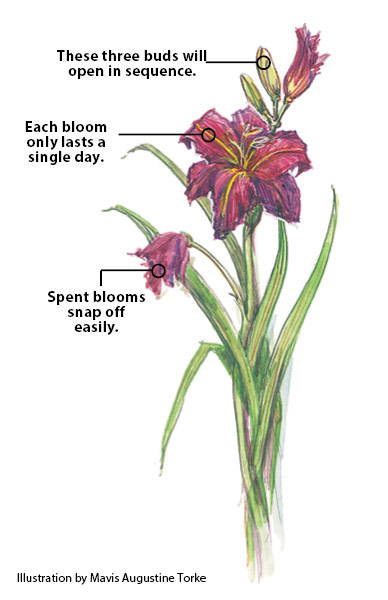
Live-heading
Keep your garden gorgeous by live-heading the daylilies every evening. Daylily flowers only bloom for 24 hours or less, so live-heading is simply plucking off the flowers that bloomed for the day knowing they won’t be there tomorrow. As an extra perk, you get time to admire the nuances and fragrances up close.
Deadheading
If you don’t get out to remove the day’s blooms, it’s easy to snap or cut the faded ones off where the colorful petals meet the stem. The illustration above shows how a flower stalk, or scape, may have buds, a blooming flower and a spent flower all at the same time.
4. Space daylily plants properly
When it comes to spacing, daylilies need room to breathe. In general, small-flowered and miniature cultivars need to be placed 16 to 24 in. apart. Plant large-blooming daylilies 18 to 30 in. apart. But for a fuller effect, space plants 12 to 18 in. apart, and divide plants more frequently.
Bareroot daylilies
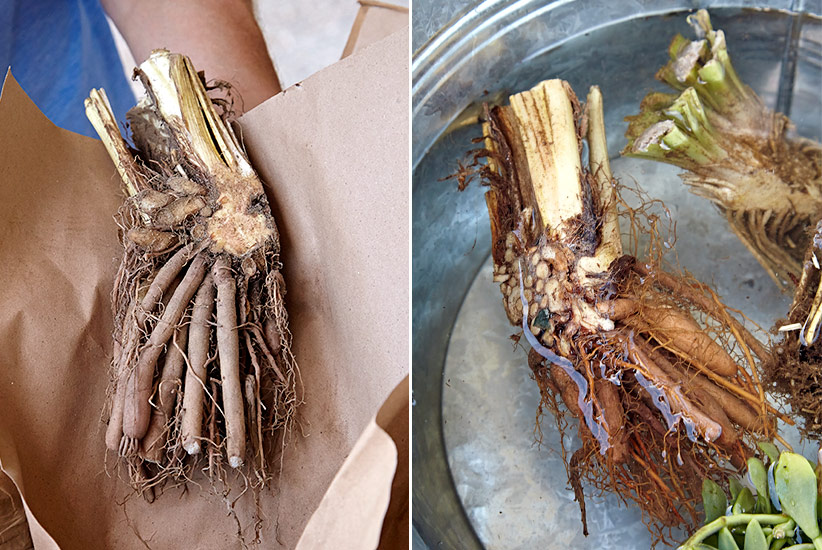
Most unique cultivars are available through mail-order services or online through independent growers. Begin looking to purchase in late winter so you can plant in spring. This will give the plants a whole season to settle into their new home. When the daylily arrives it will often be bareroot, meaning the soil has been removed. The foliage may be trimmed back or nonexistent.
Give your bareroot daylily a soak
Because the plant might have been out of the ground for a week or two, the roots will be dehydrated. Soak your plants for at least an hour and no more than a few days in water that has a splash of liquid plant food.
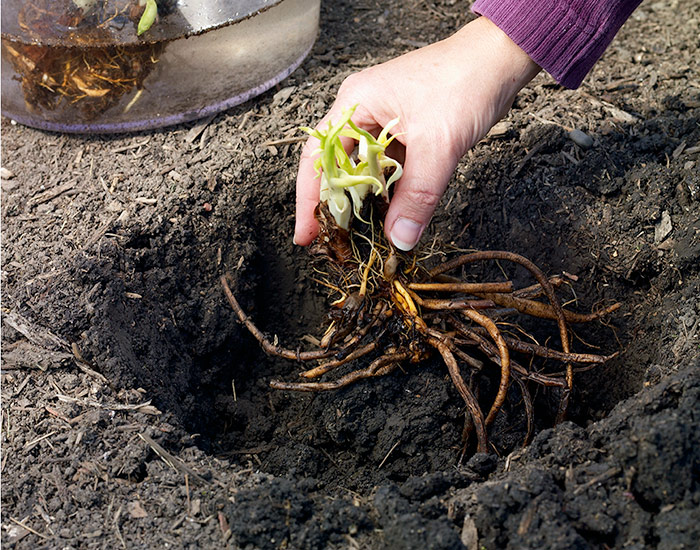
How to plant bareroot daylilies
- In full sun, dig a hole as deep as the crown — the part where the roots meet the leaves — and mound soil in the middle.
- Lay the roots over the top of the mound like you see above. The crown of the plant should be even with the top of the soil.
- Backfill with loose soil and amend with compost so it has good aeration and drainage.
- Water enough to keep the soil moist until new green growth emerges.
How to plant daylilies from the garden center
Container-grown daylilies are usually what you find at the garden center and they're super easy to plant. Just dig a hole the width and depth of the container and set the plant in so the top of the plant is at the same level in the hole that it was in the pot.
One thing you might notice is that the roots are dense and growing in circles - they may even have been growing out of holes in the bottom of the pot. If that's the case, you'll need to tease them apart with your hands. If the roots are really tight, make a few shallow vertical slices through the root ball with a soil knife or the edge of a trowel. This encourages the roots to start growing out into the soil instead of continuing to grow in circles.
You Might Also Like:
Different Types of Garden Hoses
How to Water Perennial Plants
Coneflower Growing Guide
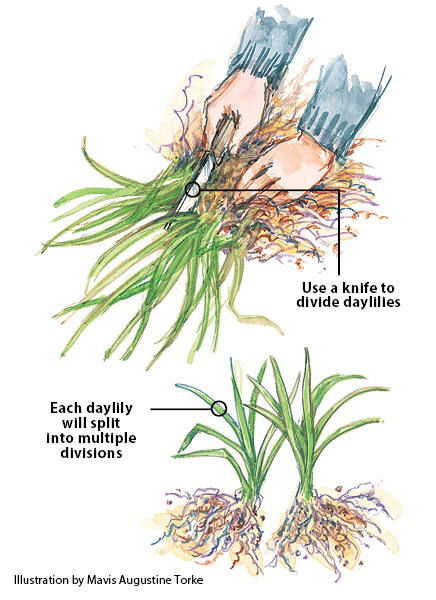
How to divide daylilies
Dividing is the best way to get more of your favorite daylilies. It can also help revive older plants that have stopped blooming vigorously. Divide in spring or fall by digging up the entire plant. Shake off the soil, and with a sharp knife, cut or pull the clump apart into several pieces. Each division should have at least three “fans,” although daylilies can grow back from as little as one fan. Replant the new divisions, water well and next year you should have a beautiful show!
Common daylily problems
Daylilies rarely give in to pests, but watch for aphids, thrips and spider mites. If you see them, treat with insecticidal soap or a shot of water from the hose.
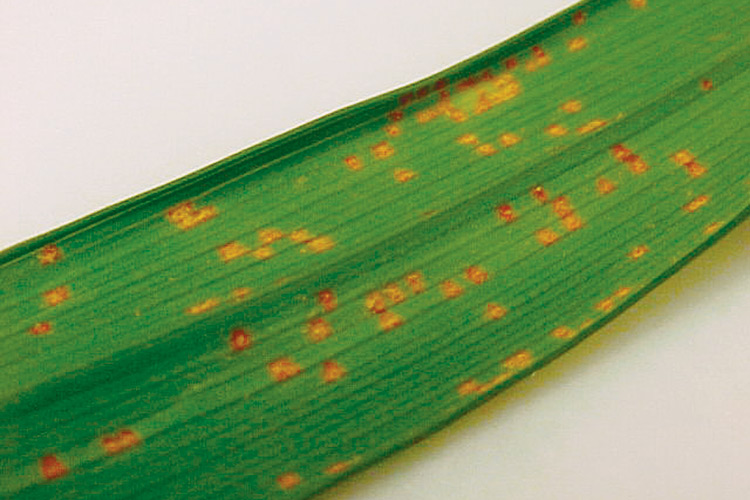
Daylily rust
Daylily rust is caused by the fungus Puccinia hemerocallidis. The main symptom of infection is raised orange or yellow spots (pustules) on the leaves, especially the undersides. Resistant daylily cultivars may only show a few spots, while other daylilies will eventually turn yellow and die back. To avoid infection, try not to water plants overhead and space plants so they have good air circulation.
Daylily rust is an airborne disease, so it’s difficult to prevent. However, there are a few things you can do once you see symptoms:
- Control rust during the growing season by applying a fungicide, according to package instructions.
- Clean up and burn or throw away (don’t compost!) diseased foliage in the fall.
- Disinfect your hands and pruners between plants as to not spread the disease.
Crown rot
Poor drainage and circulation contribute to crown rot. If a healthy plant suddenly turns yellow, withers and drops its buds, it may have rot. Lift it from the soil and check the roots for soft, mushy areas. If the soft area has a foul odor, it’s probably a bacterial problem; if it has an earthy, compost-like odor, it’s probably a fungal problem. Cut off the diseased area and treat the plant’s roots with either a bactericide or a fungicide. Then it’s ready to go back in the ground.
You Might Also Like:
5 Home Remedies for Fungal Disease in the Garden
Learn the Secrets to Combining Flower Shapes
How to Grow Tall Sedum