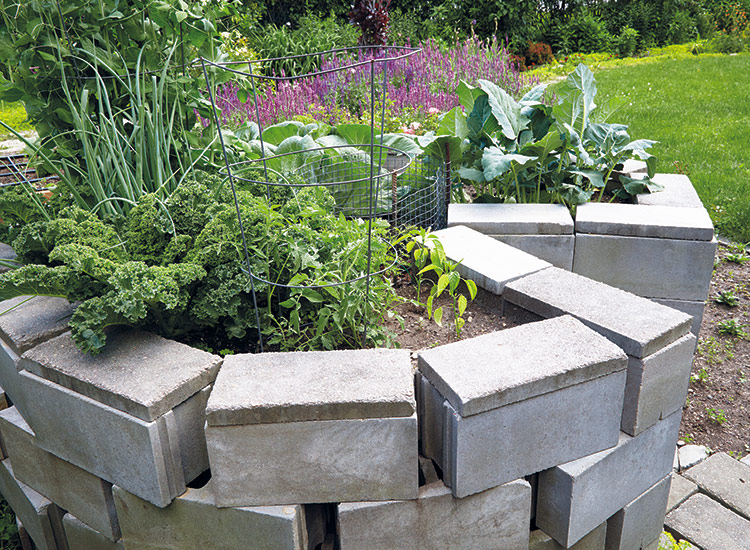
Keyhole garden beds
What could be easier than gardening in a raised bed? How about composting at the same time? Let me introduce you to the keyhole garden. A keyhole garden is a round raised bed with a pie-slice cutout for access to a composting basket in the center. The bed is filled with rocks, yard waste, decomposable plant material, and a thick layer of soil/compost on the top for planting. The center basket collects kitchen waste and other biodegradables. Watering into the basket disperses moisture and nutrients throughout the keyhole. This efficient raised bed method of gardening is often used in areas with poor soil unsuitable for growing vegetables.
How to build a keyhole garden
Before you get started constructing your keyhole garden, you will want to prepare the area. Clear enough area to make the garden no more than 6 feet across, so you can easily reach to the middle of the bed. Make sure the area is level so your bed will not be uneven.
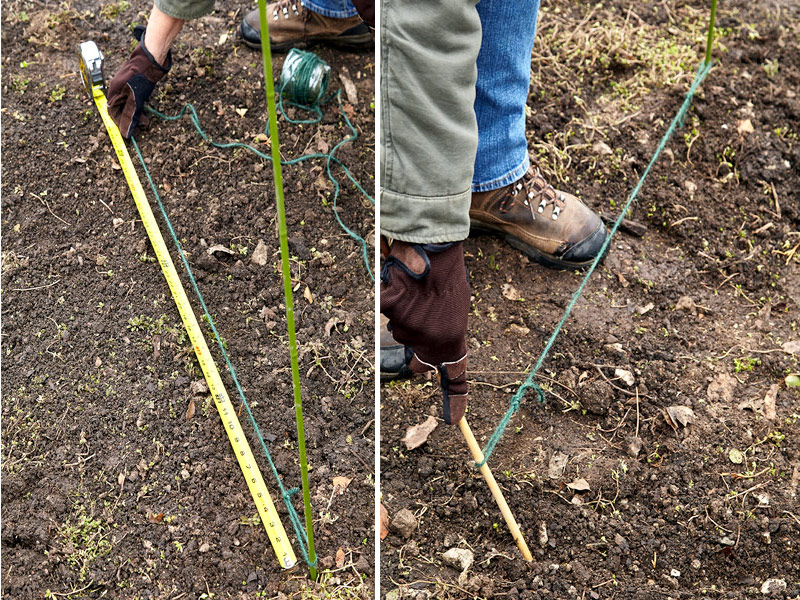
Step 1: Lay out the bed
Drive a stake in the center of the bed-to-be. Attach a length of twine loosely to the stake, measure 3 feet out from the center and mark that point on the twine with a knot.
Next, slide a stake or screwdriver through the knot and scratch a circle into the soil to mark out the bed like you see above.
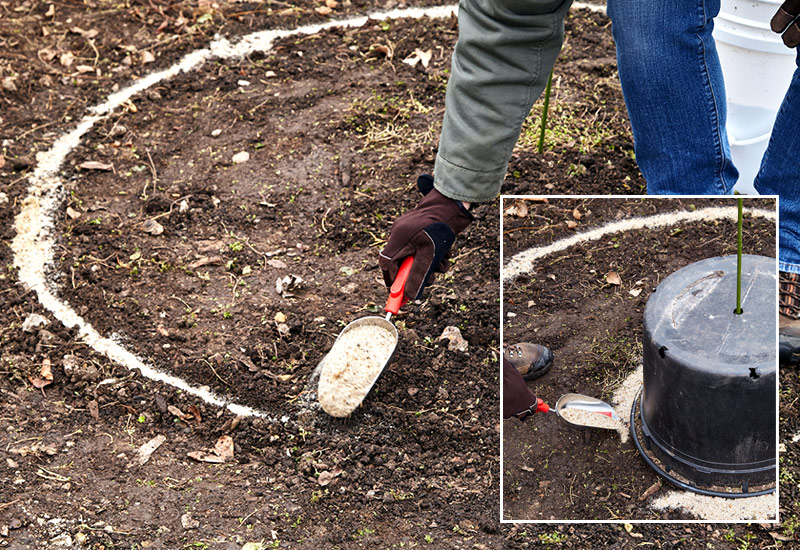
Mark the outline of the keyhole bed and compost basket
Sprinkle sand or flour into the scratched line so you can easily see the outline of the raised bed as you work.
Use the same stake and twine and make an 18-inch-diameter circle in the center to place the composting basket, or use a pot as I did here — an 18-in. nursery pot slipped over the center stake makes a perfect pattern for the composting basket.
Add an access point to the compost basket
Next, draw a wedge to the center of the bed large enough for you to get to the composting basket. Aim this keyhole to the north, the shadiest side of the bed, to keep the sunnier spots for growing.
You Might Also Like:
Garden Gate's Favorite Gardening Products
Why Should You Have a Garden Holding Bed
DIY Cold Frame
Potting Bench Project
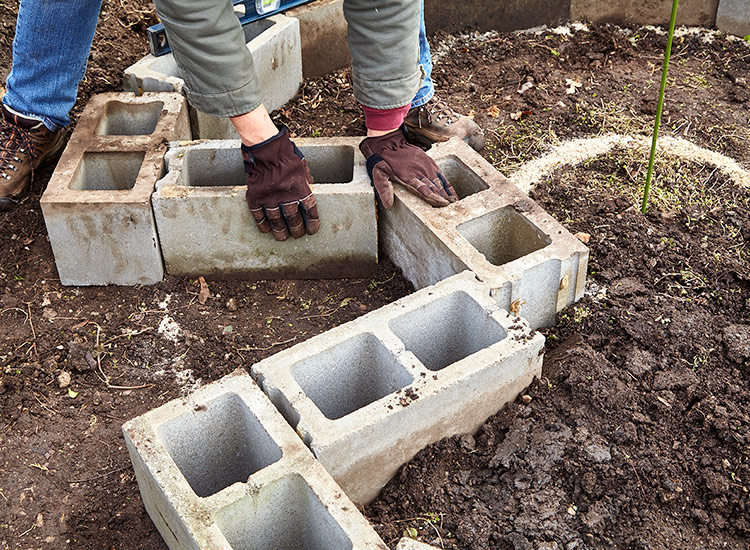
Step 2: Construct the side walls
Form the first layer of the outer wall on the marked line. Stack bricks, stones, landscaping blocks, logs — any number of new or repurposed items can form the sides of your keyhole garden.
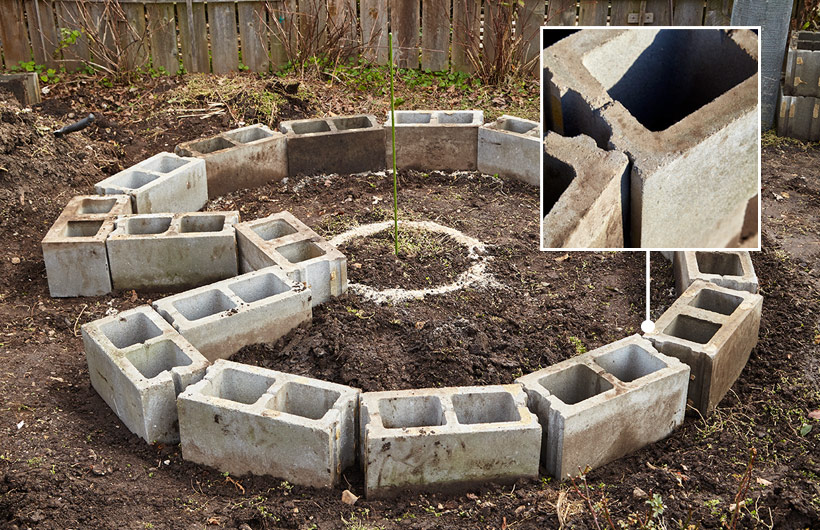
I used concrete block to make my keyhole garden. Notches in these concrete blocks fitted tight together help prevent them from shifting, as you see in the inset photo above, plus I drove rebar stakes through the center of every other block to help stabilize the wall. I topped it off with cap blocks to cover the holes.
Customize the height of your keyhole garden bed
Build the walls to your desired height — whatever is comfortable for you and easy to access the plants. You can always start lower and add height later. It is easier to build the center composting basket before you get the outer wall of the keyhole garden too high.
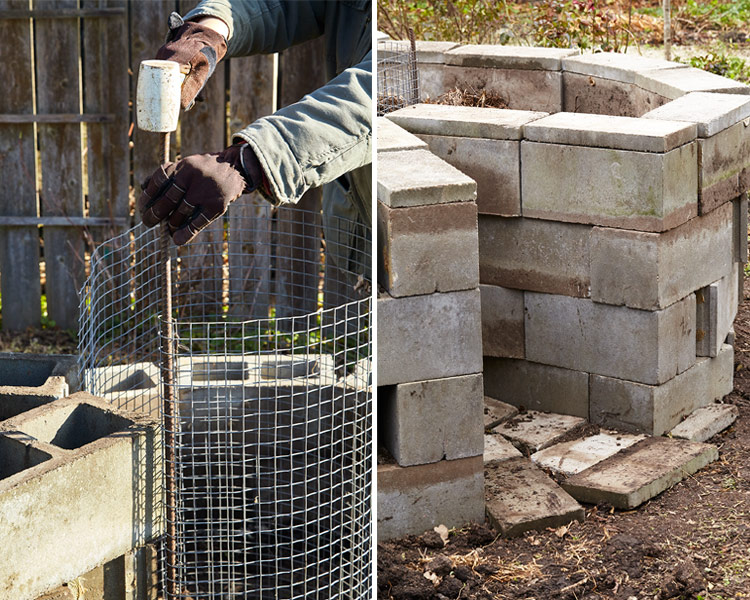
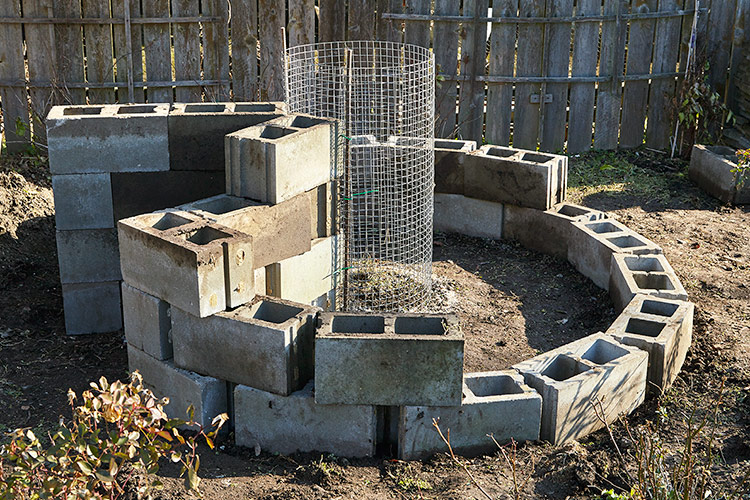
Step 3: Construct the composting basket
The sides of the 18-inch-wide center composting basket should be porous so water and nutrients can flow into the keyhole garden. I made mine with a cylinder of hardware cloth, held in place with two rebar stakes. Chicken wire, thatching, even a row of bamboo stakes are good materials to form the basket. You may want to build in a removable block or panel at the bottom of the keyhole's composting basket so you can scoop out finished compost during the growing season. Mine does not have that, but I think it would have made composting easier.
It's not a bad idea to put pavers, block, gravel or even a layer of mulch in the keyhole wedge so it doesn't get muddy as you access the compost basket. Here I used leftover cap blocks and broken pieces of concrete block to create a tidy a place to step.
Step 4: Fill the keyhole bed
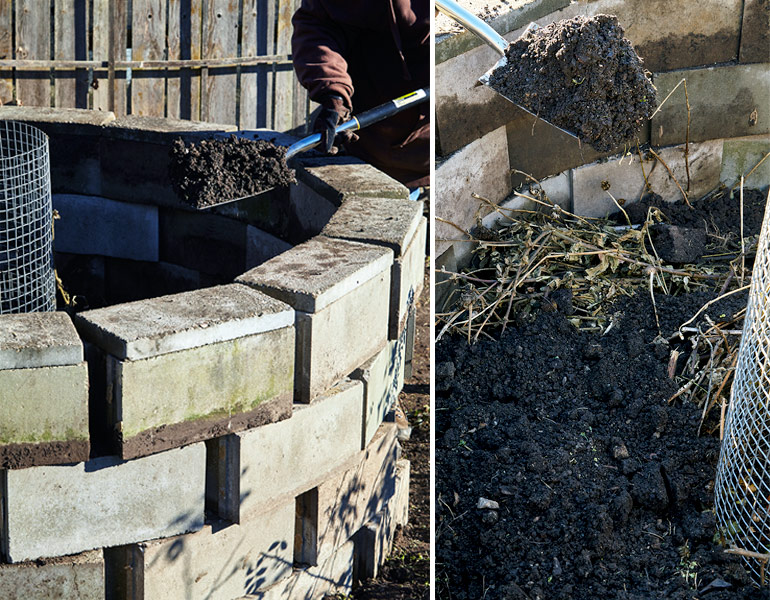
Probably the hardest part of the construction is filling the bed. It does take a lot of soil! The top 18 inches of your raised bed should be a good quality soil/compost mixture for planting. The bottom can be filler. Where keyhole gardens are common, cans, rocks, clay pots, branches and all sorts of debris may be tossed in first to fill space, followed by layers of soil, plant matter, wood ash, manure and other biodegradable materials that will become rich compost over time.
I filled mine with the end of the year’s debris and leaves from my garden cleanup on the bottom, then compost, some horse manure, and soil from 3 short raised beds I had deconstructed (and the source of my concrete block) layered in on top.
Top it off
This bed was constructed in the fall so a winter of freezing and thawing would settle the soil and fill holes deep in the bed. If you use a lot of plant debris in the bottom like I did, you may need to add more soil in the spring since the lower layers will break down and the bed will sink a couple of inches.
Don't forget to water the compost basket
Slope the soil layers down and away from the composting basket to the side wall so water will radiate out through the garden. When watering the bed, be sure to water into the compost basket to keep it moist. The water will also pick up nutrients from the developing compost and leach them into the soil of the keyhole garden.
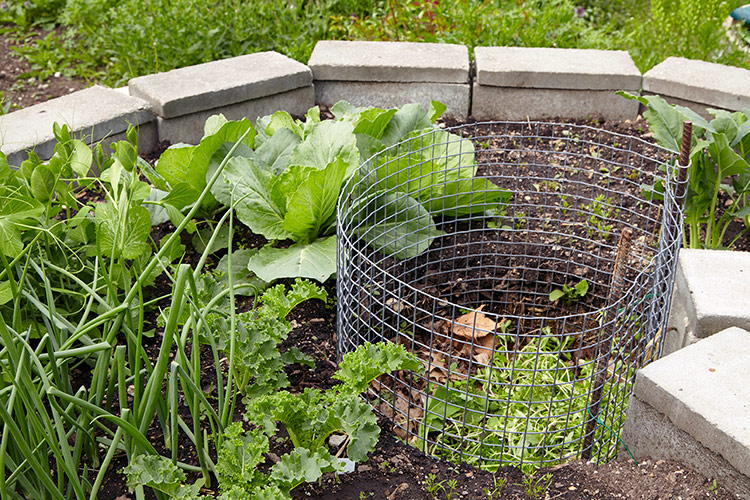
Step 5: Add plants to your keyhole garden bed
Since a keyhole garden is usually more utilitarian than beautiful, it works best for growing vegetables, though there's no reason not to add some trailing nasturtiums or petunias for a pretty touch. Soil warms up faster in spring in a raised bed like this, so you can get a jump on planting cool-weather veggies like peas, broccoli and lettuce. Erect a trellis over the composting basket to grow vining cucumbers or pole beans. And the best part is, there's minimal bending while you weed and harvest!
You Might Also Like:
Cool-Season Vegetables
6 Organic Products to Use in Your Garden
Different Types of Garden Hoses
Best Way to Water Perennials
Compost is a bonus of the keyhole garden
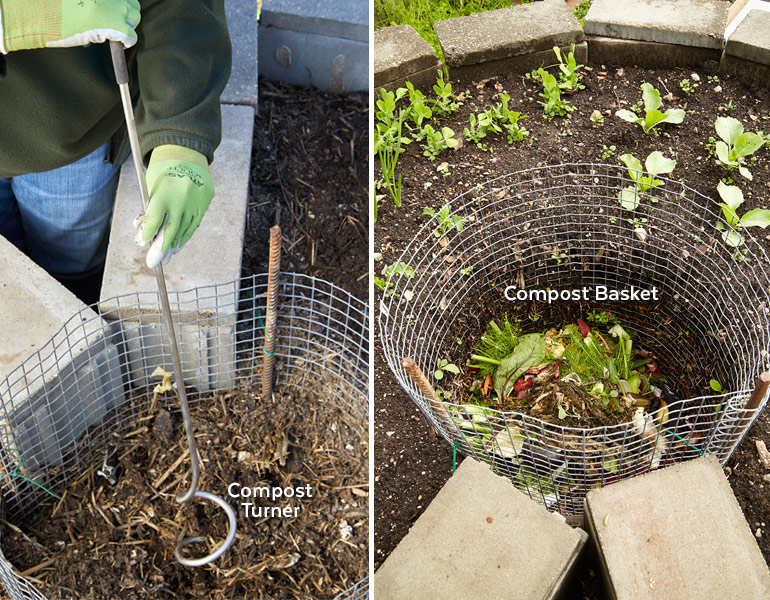
The composting basket is a handy way to get rid of kitchen scraps and weeds, with the bonus of nutrients added effortlessly to the soil as those materials decompose. If the compost basket attracts insects or starts to smell, stir the compost and sprinkle soil over the top, or add a layer of straw, leaves, shredded cardboard or dried grass clippings to the top. In the spring when the basket contents are all broken down and the basket is full, you can remove the compost to mix into the planting layer of the bed. A potato fork works well to pull compost out of the basket.
Stir it up
You can stir the compost with a compost turner occasionally throughout the growing season like you see above, but you can also simply allow debris in the basket to passively compost. In other words, don't mix it up and the bottom layer will will break down and you can scoop it out with a small shovel from the bottom as it composts. If you do it this way, it's easiest to leave a space or a removable panel at the bottom of the basket that opens in the wedge to access the compost.
Try a keyhole bed in your garden!
So if you think you don’t have the right soil to grow vegetables or enough space to compost, try building a keyhole garden. You’ll be amazed at what you can do in a 6-foot circle.